Unlocking Secure Online Shopping: Building an Authenticated e-commerce site using Passage and Nuxt.js

I am a self taught developer from Nigeria. A software engineer, technical writer and a fish technologist in making. I love diversity and always available to learning and acquiring new knowledge
sellWise: 1Password and Hashnode Hackathon
Introduction
In today's digital age, online security plays a crucial role in safeguarding our personal information, financial transactions, and sensitive data. As we increasingly rely on the Internet for communication, shopping, banking, and various online services, it's essential to understand the importance of protecting our online identities and maintaining robust security measures.
This article will discuss implementing seamless passwordless authentication in your e-commerce app with Passage
What is Passage
Passage is a secure and complete user authentication solution. That helps you integrate secure login and registration with biometrics or magic links instead of passwords into your applications and also provides the smoothest login experience possible.
Setting up the project
You need to create a Nuxt.js starter project by navigating to the desired directory and running the command below in your terminal.
npx nuxi@latest init 1Password-nuxt
The command creates a Nuxt.js project called 1Password-nuxt.
Next, you need to install Nuxt.js dependencies by running the command below in your terminal.
npm install
Next, go to the project directory and start the development server on localhost:3000 with the commands below.
cd 1Password-nuxt && npm run dev
Installing dependencies
Installing Pink Design
Pink Design is an open-source system from Appwrite used to build consistent and reusable user interfaces. It enhances collaboration, development experience, and accessibility.
To install Pink Design, open the terminal in the project directory and run the following command.
npm install @appwrite.io/pink
To use Pink Design in your project, import it into your project's files like this:
import '@appwrite.io/pink';
`import '@appwrite.io/pink-icons';
Installing Appwrite
Appwrite is a development platform that provides a powerful API and management console for building backend servers for web and mobile applications. To install it, run the command below:
npm install appwrite
Installing Passage
The easiest way to add authentication to your app is with a Passage Auth custom element. First, you'll need to install the passage-elements package from npm:
npm i --save @passageidentity/passage-elements
Passage console
To use Passage, you have to signup here first, go to My Apps, then create a new app
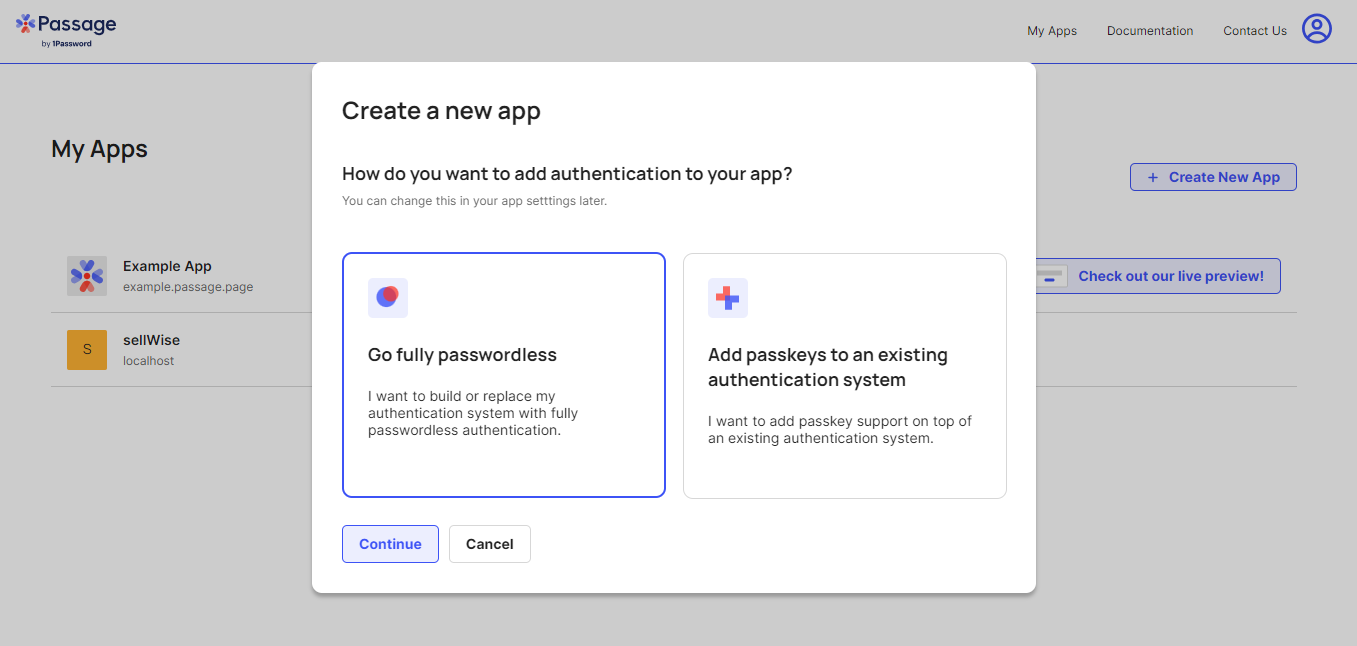
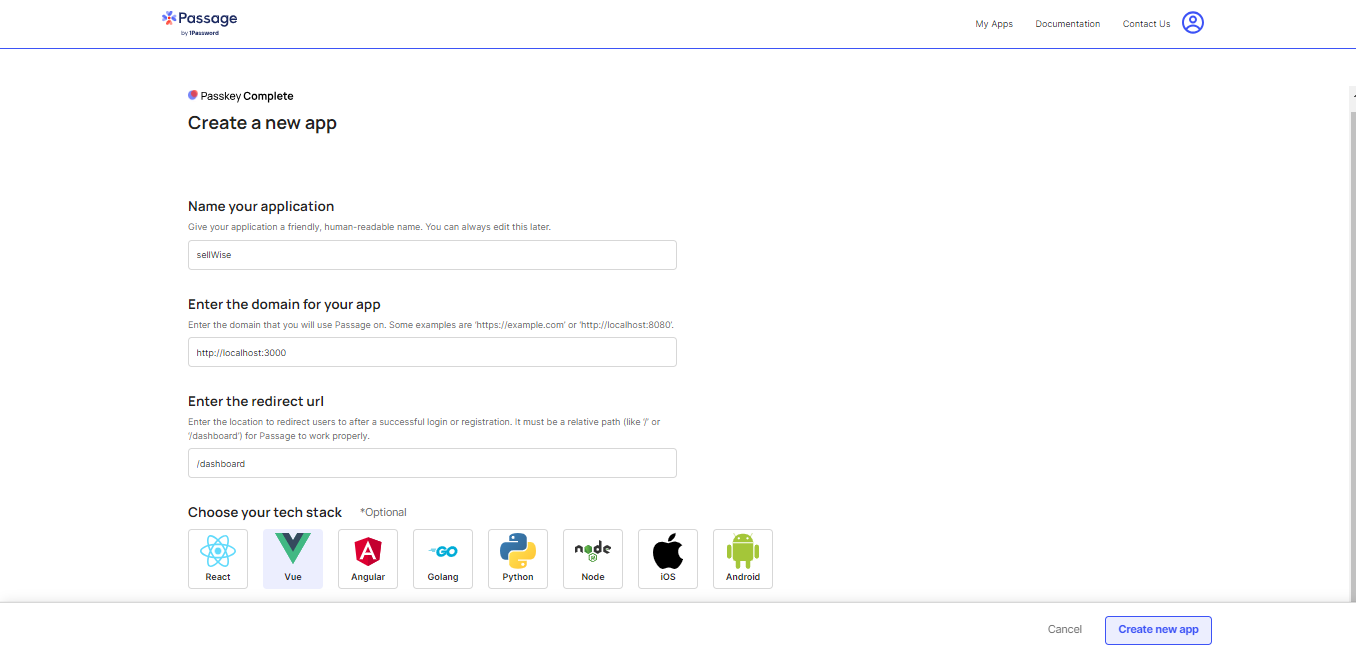
You can give any name to your app. For the domain in Nuxt.js, it will be localhost:3000, and the redirect URL is the URL that will be used to redirect the user after a successful login or registration, like /dashboard or /home.
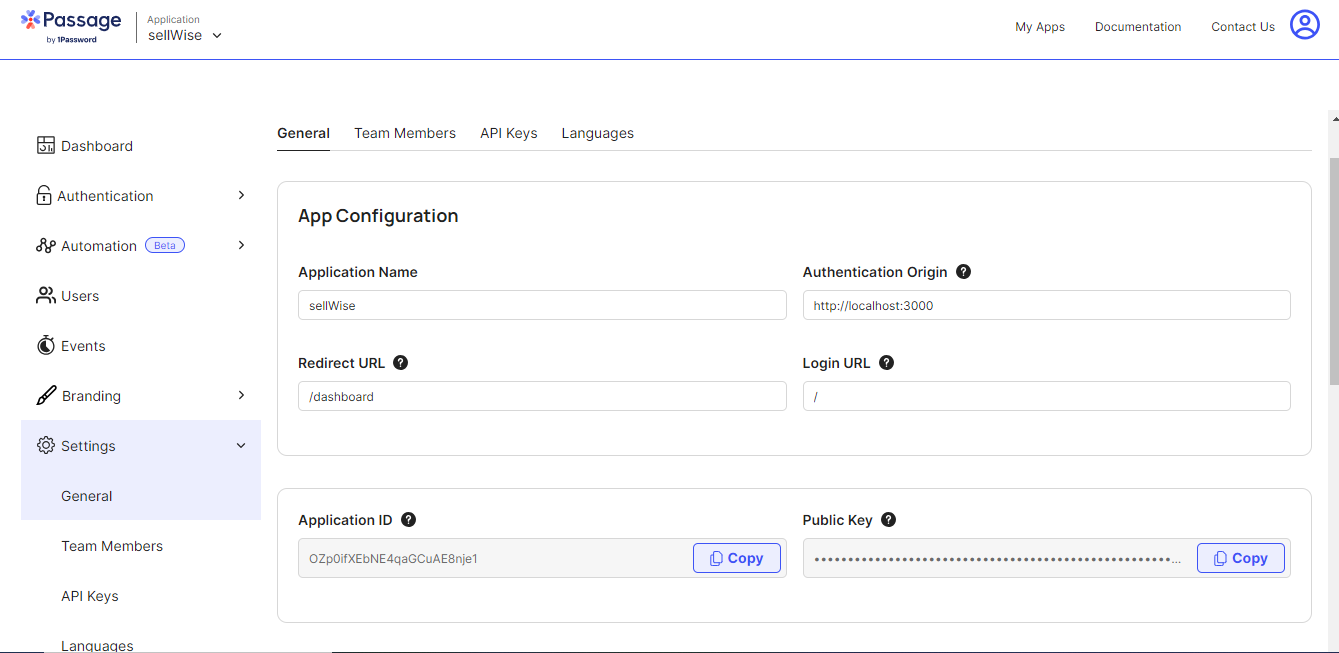
After creating your app, you will be redirected to the app dashboard. A new App ID will be generated to use it in your app.
To find it, head to the settings section, then General
Interacting Passage with Nuxt app
After creating your app and getting the App ID, you will need to create a .env file and insert the ID:
NUXT_APP_PASSAGE_APP_ID= your_app_id
Creating the sign-in page
You need to import the Passage custom element in your Nuxt components to register it.
To do that, navigate to your components/passageAuth/Signup.vue and do these:
import "@passageidentity/passage-elements/passage-auth";
Then, in your Nuxt <template>, embed the passage-auth element into your component that will handle login.
<template>
  <section class="container">
    <div>
      <div
        class="card u-cross-center u-width-full-line u-max-width-400"
        style="margin: 50px auto"
      >
        <div class="authContainer">
          <passage-auth :app-id="appId"></passage-auth>
        </div>
      </div>
    </div>
  </section>
</template>
Configuring Nuxt to Recognize Custom Elements
Nuxt works with custom elements out of the box, and by default, it will log a warning to the console that it could not resolve the component for the custom element. To configure Nuxt with information that the <passage-auth> tag is a custom element and suppresses this warning.
You can add this configuration to nuxt.config.ts:
compilerOptions: {
// treat any tag that starts with passage- as custom elements
isCustomElement: (tag) => tag.startsWith('passage-'),
},
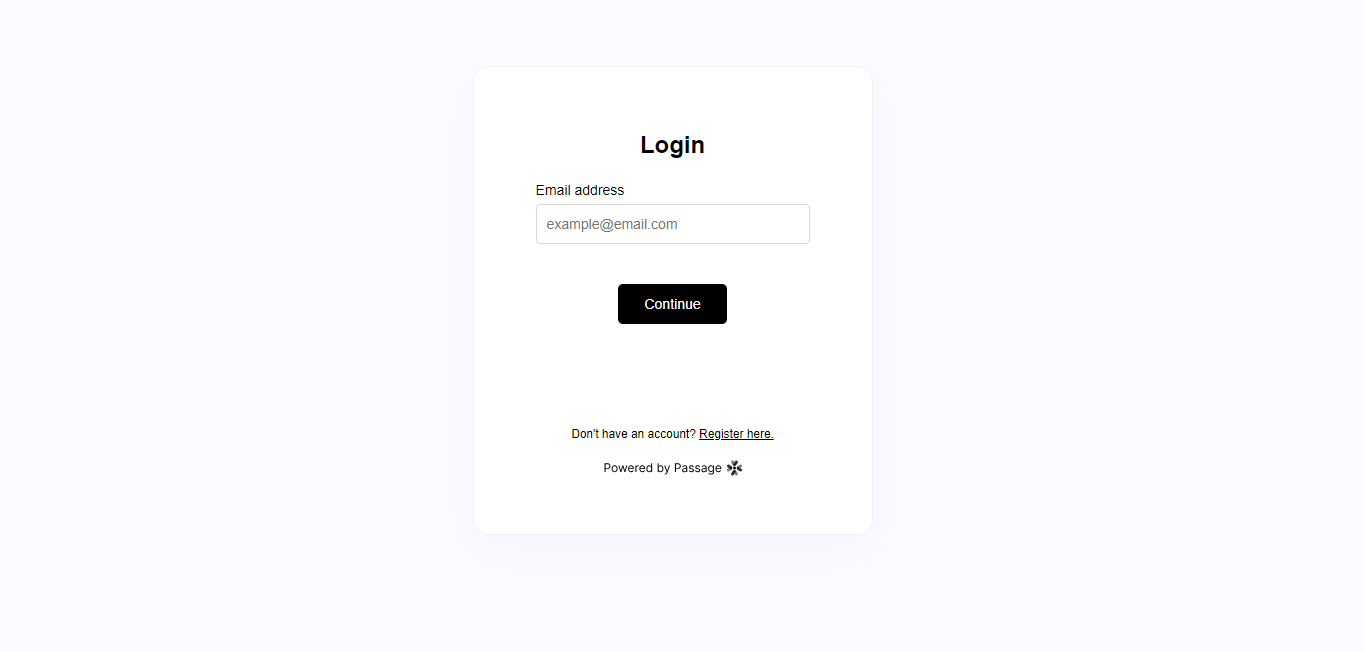
After applying the above implementation, the app should like this
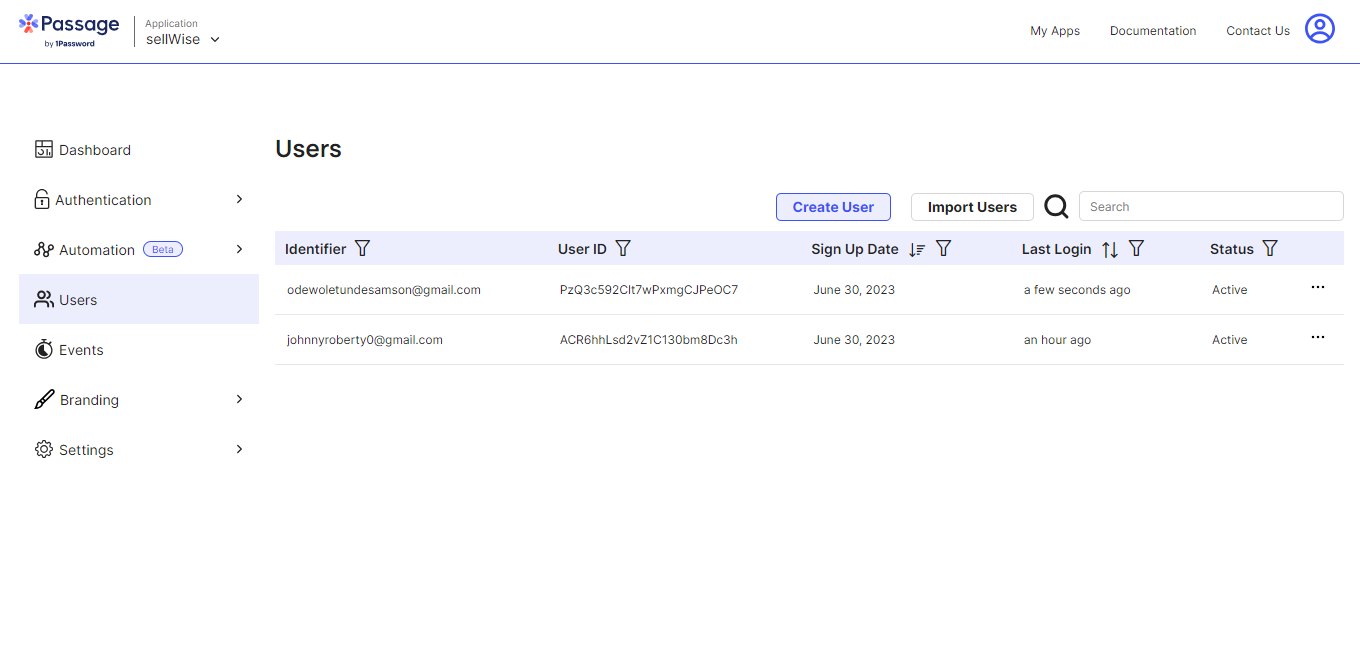
After signing up with your email address, navigate to your passage console. The User tab should display the new users like this:
Getting Authentication status and User information
After the user has logged in with Passage, you can check if a user's auth token is valid and retrieve basic user information from Passage using the PassageUser class exported from @passageidentity/passage-auth/passage-user.
To do this, create a composables folder in the root directory and inside a useAuthStatus.js file, add the following code
import { ref } from 'vue'
import { PassageUser } from '@passageidentity/passage-elements/passage-user'

export function useAuthStatus(){
  const isLoading = ref(true)
  const isAuthorized = ref(false)
  const username = ref('')

  new PassageUser().userInfo().then(userInfo => {
      if(userInfo === undefined){
          isLoading.value = false
          return
      }
      username.value = userInfo.email ? userInfo.email : userInfo.phone
      isAuthorized.value = true
      isLoading.value = false
  })

  return {
    isLoading,
    isAuthorized,
    username,
  }
}
Tech Stack
Nuxtjs
Passage - Authentication
Appwrite Cloud - Database, Storage, Real-time
Styled with Pink Design
Vercel - Deployment
Quick Demo
The project demo can be found here
GitHub
The project's GitHub repository can be found here.
Conclusion
This article discussed building an authenticated seamless passwordless e-commerce site using Passage in a Nuxt.js application.


